

Learning how to make soap to sell is a great way to earn a living while doing what you enjoy.
The demand for handcrafted soaps and eco-friendly products is sky high. Many soap makers make good money selling unique soap bars online or at local markets.
This guide will teach you everything you need to know about how to make soap and be profitable while at it.
Turning your handmade soaps into a thriving business starts with a beautiful, easy-to-navigate website that highlights your products and brand story. Check out our recommended website builders, to create a professional online store that helps you attract customers and grow your soap business.
Best Website Builders to Start Selling Handmade Soap Online
| Provider | User Rating | Recommended For | |
|---|---|---|---|
| 4.6 | Beginners | Visit Hostinger | |
| 4.4 | Pricing | Visit IONOS | |
| 4.2 | Design | Visit Squarespace |
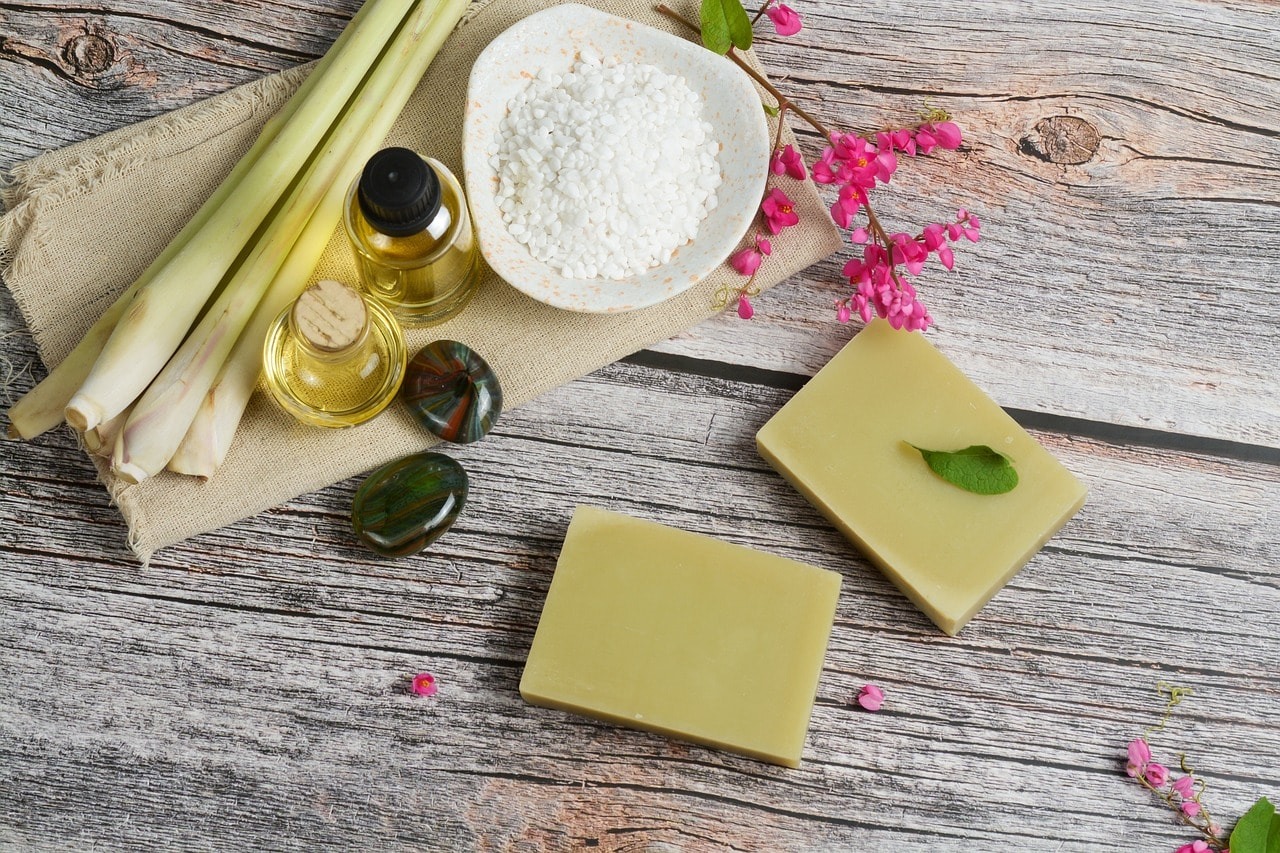
The Art of Soap Making

Soap making is an art and a science. It’s creative but also relies on precise measurements and a chemical reaction. Let’s get into the process of how to make homemade soap to sell.
The Science of Soap
Soap is made through a process called saponification. This chemical reaction happens when fats or oils, like olive oil or coconut oil, mix with an alkali, like lye. The result? Soap! It’s a simple but powerful process you can do at home.

Soap has been around since the Stone Age, when people washed with plant sap. Around 2800 BC, the Babylonians discovered the first soap recipe by mixing water, an alkali, and cassia oil. By the 12th century, soap-making was big.
Today, soap makers experiment with scents, colors, and designs to create unique soap products for modern buyers.

There are four ways to make soap, each with its own style and benefits:
- Cold Process: This classic method mixes oils and lye at room temperature. It’s versatile and great for adding essential oils, colors, and other additives. Cold process soap takes 4-6 weeks to fully cure. The result is a smooth, customizable soap that feels luxurious.
- Hot Process: You heat the soap mixture to speed up saponification. Hot process soap has a rustic look and cures much faster than cold process soap. It’s ready to use the next day, making it perfect for soap makers who want quicker results.
- Melt-and-Pour: This beginner-friendly option uses a pre-made soap base. You melt it, add your preferred additives like oils, and pour it into molds. Quick, easy, and no curing required.
- Rebatching: Rebatching lets you reuse leftover or imperfect soaps. Grate or chop the soap, add water and optional extras, heat it until smooth, and pour into molds.
Regardless of the method, understanding the role of key ingredients is important:

- Oils: Oils are what make soap moisturizing and cleansing. Each oil has its own qualities. Coconut oil creates a hard bar with a rich lather; olive oil produces a milder, conditioning soap.
- Lye: This strong alkaline is essential for the saponification process. Handle with care and always follow safety rules.
- Water: Dissolves the lye so it can react with the oils and create soap.
- Additives: These enhance the soap’s look or benefits. Use essential oils for scent, botanicals like oats for exfoliation, or clays for natural color.
Soap Making Supplies

Before you start your business, get the right tools and supplies:

- Safety Gear: Lye is caustic. Always wear gloves, goggles, and a mask for protection.
- Mixing Containers: Use heat-resistant bowls made of stainless steel or durable plastic. Avoid aluminum.
- Measuring Tools: Accuracy is key in soap making. A good digital scale and thermometer are must-haves.
- Stick Blender: This tool helps mix oils and lye until the soap mixture reaches “trace,” the point where it thickens.

- Soap Molds: Choose molds to shape your soap bars. Silicone molds are flexible and easy to use.
- Additives: Customize your soap with essential oils, clays, dried herbs, or natural colors.
Your Signature Soap: How to Make Soap From Scratch
| Method | Cold Process | Hot Process | Melt-and-Pour Process |
| Lye | Yes | Yes | No |
| Cure Time | 4–6 weeks | Few days | Once cooled |
| Customization | Full Control | Full Control | Limited to additives |
| Texture & Finish | Smooth, professional finish | Rustic, rougher texture | Clean and uniform |
| Saponification | Happens during the curing process | Happens during the cook | Already completed in base |
| Market Demand | High | Moderate | High |
Now that you know the basics, let’s get started. We’ll cover three methods: cold process, hot process, and melt-and-pour. Each has its own benefits and techniques.
Cold Process
Cold process soap making is a fun experience that allows for endless creativity. Here’s a step-by-step guide:

- Prepare the Lye Solution: Add lye to water slowly (never the other way!). Stir until it dissolves completely. Be careful—it heats up quickly. Work in a well-ventilated area with proper safety gear.
- Measure and Combine Oils: Weigh your oils and melt any solid fats like coconut oil. Mix them in a heat-safe container. Choose oils like olive oil for mildness or shea butter for moisture.
- Cool the Lye Solution and Oils: Let both cool to 100–110°F. Temperatures should be close for best results.
- Combine Lye Solution and Oils: Slowly pour the lye solution into the oils, stirring gently to combine.
- Blend to Trace: Use a stick blender to mix until it thickens. At “trace” the mixture leaves a line when drizzled back onto the surface.
- Add Colors and Scents: Mix in essential oils, fragrance oils, or natural additives like cocoa powder or poppy seeds for exfoliation.
- Pour into Molds: Pour the soap into your chosen soap molds.
- Insulate and Cure: Cover the molds to keep them warm. Let the soap cure for 24–48 hours.
- Unmold and Cut: Once firm, remove the soap and cut it into bars.
- Cure the Bars: Let the bars cure for 4-6 weeks on a rack. This allows the saponification process to finish and create a durable, high-quality soap.


Tips for Cold Process
For the cold soap-making process, always work in a well-ventilated space. Wear proper safety gear like gloves and goggles.
Use precise measurements to ensure saponification happens correctly. Don’t overheat the lye solution or oils. Monitor temperatures closely and be patient while your soap cures.
Hot Process
Hot process soap making works like cold process, but with heat. This speeds up the saponification process, so your soap is ready faster.

- Prepare the Lye Solution and Oils: Follow the cold process steps, mixing lye and oils carefully.
- Combine Lye Solution and Oils: Slowly pour the lye solution into the oils. Stir gently.
- Cook the Soap: Place the soap mixture in a crock pot or double boiler. Cook on low heat, stirring regularly to avoid scorching.
- Monitor for Stages: Watch as the soap changes from a thin liquid to a thick, mashed potato texture.
- Add Colors and Scents: At the gel stage, mix in essential oils, fragrance oils, or colors.
- Pour into Molds: Transfer the soap to your soap molds and smooth the surface.
- Cure: Let the soap cure for 1-2 weeks before use.

Tips for Hot Process Soap Making
To prevent scorching during the process, use a slow cooker or double boiler and stir the soap mixture frequently for even cooking.
Always handle the hot mixture with care to avoid burns or accidents during the process

Melt-and-Pour: Quick and Easy
Melt-and-pour is perfect for beginners. It’s also great if you want to make soap fast. This method uses a pre-made soap base, which you can melt and customize in no time.
- Choose a Soap Base: Pick a melt-and-pour base that fits your needs. Options include clear, opaque, or bases with extras like shea butter or goat milk.
- Melt the Base: Cut it into chunks and melt in the microwave or a double boiler.
- Add Colors and Scents: Stir in essential oils, fragrance oils, or colorants.
- Pour into Molds: Pour the liquid into soap molds.
- Cool and Unmold: Let the soap cool completely, then remove it.

Tips for Melt-and-Pour Soap Making:
Don’t overheat the soap base; it can damage the quality. Work fast to ensure the soap doesn’t harden before pouring it into molds.
To remove surface bubbles, spray a light mist of alcohol over the soap after pouring. These simple tips will give you smooth, professional results.
Top Soap Recipes for Online Sales
Now that you know the soap-making basics, let’s check out popular recipes for selling handmade soap online.
1. The Classic Castile Soap
Castile soap is mild and works for all skin types. Made with 100% olive oil, it’s natural and versatile.
Customize it by adding different oils, essential oils, or other additives. Loved by handmade soap and natural products fans, it’s perfect for anyone looking for skin-friendly options.

Ingredients:
- 100% Olive Oil
- Lye
- Water
Benefits:
- Mild and moisturizing, perfect for sensitive skin.
- Versatile: use for body, face or hair care.
- Eco-friendly and biodegradable, great for environmentally conscious shoppers.

Customization Ideas:
- Add essential oils to create unique fragrances.
- Use botanicals like lavender or calendula for a natural look and soothing properties.
- Try different oils to make soaps for specific skin types or needs.
2. The Luxurious Shea Butter Soap
Shea butter is a rich, natural moisturizer that turns soap into a luxury item. Its soothing properties make it perfect for dry or sensitive skin. This ingredient is a favorite in homemade and handmade soaps.

Ingredients:
- Olive Oil
- Coconut Oil
- Shea Butter
- Lye
- Water
Benefits:
- Moisturizing and nourishing, leaves skin soft and hydrated.
- Creates a creamy lather that elevates the bathing experience.
- Gentle and soothing, perfect for dry or sensitive skin types.
Tips:

- Use high-quality shea butter for maximum moisture and skin-soothing effects.
- Pair with essential oils that complement the natural shea scent for a balanced fragrance.
- Add oils like avocado or almond to boost the soap’s moisturizing properties.
3. The Exfoliating Coffee Scrub Soap
Coffee grounds exfoliate gently, making soap perfect for removing dead skin cells. This simple addition leaves skin smoother and brighter. It’s a favorite for anyone looking to refresh and rejuvenate, with both luxury feel and visible results.
Ingredients:
- Olive Oil
- Coconut Oil
- Coffee Grounds
- Lye
- Water

Benefits:
- Gently exfoliates the skin, leaving it refreshed and glowing.
- Boosts circulation, healthy skin, and radiance.
- Makes skin feel soft and smooth, adds luxury to bath time.
Tips:
- Use finely ground coffee for a mild scrub, perfect for sensitive skin.
- Add vanilla or cinnamon to enhance the aroma for a spa-like feel.
- Try other exfoliants like oatmeal or poppy seeds for added texture and benefits.

Building Your Online Soap Empire
Making soap is just the beginning. Turning it into a profitable e-commerce soap business takes more work.

You’ll need a strong online presence to reach customers and market your handmade soap effectively. Follow these steps to build a thriving business and start selling soap online.
Setting Up Your Soap Making Website
Your website is your digital storefront: the first place many customers will discover your handmade soaps. It should be inviting, easy to navigate, and designed to leave a lasting impression.
Start by using a clean, professional design that highlights what makes your soap special. Showcase the quality, natural ingredients, and unique features with high-quality images and clear descriptions.
A dedicated website also gives you full control over your brand. You can share your story, educate visitors about the benefits of handmade soap, and build a community of eco-conscious shoppers—all without the limitations or fees of third-party marketplaces.
To support your business, choose the best web hosting. Fast loading speeds, reliable uptime during peak shopping hours, and secure payment processing are essential to running a successful online store.

Choose the Right Platform
Different e-commerce platforms fit different needs and budgets. Shopify is great for features and scalability. Etsy connects you with buyers looking for handmade soap or crafts. Wix offers simple drag-and-drop tools and beautiful templates.
Consider your budget, skills and customization needs before choosing where to sell your soap products online.

Create a User-Friendly Design
A simple and beautiful website is key to happy customers. Use a clean, modern design that matches your brand. Make sure your site is mobile-friendly since most shoppers use their phones. Keep language clear and organize products into categories so customers can browse easily.
Showcase Your Soaps with High Quality Images
Take clear professional photos that show your soap’s beauty, texture, and features. Use natural light and capture from different angles. Include lifestyle shots with the soap in use to create interest and connect with your audience.

Write Compelling Product Descriptions
Use descriptive text to showcase each soap’s scent, texture, and benefits. Highlight ingredients like coconut oil, shea butter, and essential oil blends. Mention skin types or exfoliation. Add keywords to boost search engine visibility and attract buyers.
Check out this guide on how to sell online for more tips.
How to Market Your Soap
To sell your soaps, you need a solid marketing plan. Use both online and offline methods. Reach your ideal customer and grow your brand’s visibility through targeted strategies and consistent effort.

Social Media
Instagram, Facebook, and Pinterest are great for showcasing your soap products. Post beautiful photos, behind-the-scenes videos, and customer reviews.

Share your process to connect with your followers. Run fun contests or giveaways to grow your audience and drive traffic to your store.
Content
Write blog posts, share soap-making tutorials, and show behind-the-scenes moments to connect with your audience.
Offer tips on using your soap, highlight ingredient benefits, and tell your brand’s story. Use SEO to boost organic traffic and attract more visitors.
Build your email list by offering exclusive discounts or helpful content. Send newsletters with product updates, soap-making tips, or special offers to keep customers engaged.

Personalize emails and segment your audience. This will keep your content relevant and boost relationships—and sales.
Paid Advertising
Run targeted ads on Google or social media to reach more people and increase sales. Paid ads bring in customers who may not find you otherwise. Set a budget that works for you and track your results to ensure a good ROI.
Public Relations
Connect with bloggers, influencers, and media outlets to showcase your soaps and brand. Media features build credibility and expand your reach. Send free samples or offer exclusive discounts to encourage them to feature your products and share your story.
Partnerships
Work with businesses that complement your soap products to cross-promote. Partner with local boutiques, spas, or online retailers to sell soaps or create joint promotions. This opens up new customers and broadens your market reach.
Pricing and Packaging

Pricing is key to attracting customers. Pair it with beautiful packaging to increase profits.
Pricing Strategies
Research your competitors and factor in costs, profit margins, and customer perception when pricing. Use cost plus pricing by adding a markup to your expenses.
Research market prices for similar soaps. Quality, ingredients, and brand image matter. Be flexible—adjust prices based on sales trends and feedback from soap buyers.
Packaging
Use eco-friendly materials that match your brand and keep your soap safe during shipping. Recycled or biodegradable options attract eco-conscious customers. Make your packaging pretty and consistent with your brand.
Shipping

Protect your soaps during shipping with secure packaging. Use sturdy boxes and cushioning to keep them safe. Offer standard and expedited shipping options to meet customer needs. List shipping rates and policies on your site to avoid confusion and build trust.
Understand the pros and cons of e-commerce to set up your soap business for success.
Legal and Regulatory Stuff
Before you sell soap, you must follow the rules. Understanding these is key to success.

Soap Making Regulations
- Labeling Requirements: Soap labels must list all ingredients, include cautionary statements (if needed), and display business info.
- Soap vs. Cosmetics: Know the difference. Soap is for cleaning, cosmetics are for beauty. These have separate rules to follow.
- Local and State Regulations: Check your area’s rules for making and selling soap. Stay compliant to avoid legal issues.
Business Licenses and Permits

- Business Licenses: Get the business licenses and permits needed to run your soap business.
- Sales Tax: Know your state’s sales tax rules and follow them.
- Insurance: Protect yourself with product liability insurance in case of claims about your soaps.
Authorities and Regulations
| Authority | Link |
| Federal Trade Commission (FTC) | https://www.ftc.gov/ |
| Internal Revenue Service (IRS) | https://www.irs.gov/ |
| Internal Trade Administration (ITA) | https://www.trade.gov/ |
| US Patent and Trademark Office (USPTO) | https://www.uspto.gov/ |
| US Copyright Office | https://www.copyright.gov/ |
| State Licensing Boards and Regulatory Agencies | (Varies by state) |
Conclusion
Starting an online soap business takes creativity, skill, and planning.
Focus on making great handmade soaps, designing a pretty online store, and marketing to meet customer expectations. Don’t forget to follow the rules to stay on track.
With time and effort, it will grow into a profitable soap business.

What Now?
- Set Up an Online Store: Launch your website or use Shopify or Etsy.
- Choose a Hosting: Select a fast, secure, and scalable hosting provider.
- Develop a Marketing Plan: Promote through social media, newsletters, and local businesses or craft shows.
- Find Shipping: Compare e-commerce shipping options for a global market.
- Add to Product Line: Add bath bombs or organic milk soap.
More Reading & Resources
- How to Start an E-commerce Business
- WordPress SEO: Tips to Boost Your Rankings Now
- Digital Marketing for Beginners
- Step-by-Step Guide To Setting Up An eCommerce Site
- Best Website Builders for E-commerce
- How to Boost the SEO of Your Website
- Optimize Your Website for Success
- Use Top Analytics Tools
- Things to Consider Before Choosing A Website Provider
- E-commerce Marketing Strategies
- Business Models in E-commerce


